Showing posts with label skirts. Show all posts

Monday, 14 November 2011

Butterick 5602 - the shapely shift!

As my last two makes were useful wardrobe basics I gave myself permission to indulge myself with another dress – I just love to make dresses! Since finishing my Chanel inspired dress (blogged about here) I have been eager to make another version of the pattern. Here’s what I came up with

Butterick 5602 shift dress

This is the pattern

Butterick 5602 pattern envelope

Last time I made the one with sleeves, this time I made the version pictured on the right (but without the bow at the neck – it’s not that I don’t like bows, I do, but I just didn’t want a bow on this).

The fabric is a wool challis, called ‘Stingray Frieze’ purchased from Vogue Fabrics. I love the print and it has a beautiful (in the words of Vogue Fabrics) “featherweight weave” and “alluring drape” - it certainly is lovely and light to wear. I used a plain black wool challis for the neck and hem bands and I lined it with my favourite bemberg rayon lining.

There’s not a lot else to say about this pattern – it’s a simple shift dress, nicely shaped and fairly fast and easy to make. So, moving on, I’m going to reveal what I’m working on right now, which is this skirt from the October issue of Burda Style.

Burda Style October 2011 #119

Despite liking lots of patterns in Burda Style magazine I haven’t actually made one for a while. I think that what has been putting me off is that since they have been printing twice as many patterns on each of their pattern sheets it is a REAL PAIN to trace them. (Hello, people who run Burda Style – did you hear that?) But I bit the bullet and got on with it. However, I do have a tip to make it a little easier. Before you lay the tracing paper on the pattern sheets, take a brightly coloured highlighter pen and go over the lines for each of the pattern pieces in the size that you want to trace.
 
The pattern pieces I want are highlighted in yellow

If you do this, it is much easier to identify through the tracing paper the lines that you should be following. It’s still a pain, but not quite so bad! Now the worst bit is over, the skirt is coming along nicely. So, more about that soon …

Friday, 2 September 2011

Vogue 8603 and how a zebra wears her stripes!

My latest make is one of those great wardrobe staples - a pencil skirt made in an animal print. Classic styling in a fun fabric.

Zebra print pencil skirt

The pattern is Vogue 8603 - for a variety of lined, straight skirts with princess seams and a back zipper.

Vogue 8603

The version I made has a gathered panel at the bottom of the centre back (which isn't shown in the picture above).

Inside the skirt - the back

I have made this pattern before in plain black (blogged about here) and really like the fit, so when I purchased this zebra print cotton fabric I knew straight away what I wanted to do with it.


Zebra stripes run from selvedge to selvedge

It was only when I came to cut the fabric that it dawned on me that if I cut the skirt on the lengthwise grain (in the usual way) the zebra stripes would run horizontally around my body. Now I'm not a great stickler for those rules that dictate what different body types should wear but I have to admit that, as I am short, I do tend to find that horizontal stripes, especially on a skirt, have the effect of making me look shorter and wider than I want to look.

Out of interest I thought that I would check out which way a zebra wears her stripes. It turns out that she wears them vertically at the front and horizontally at the back.

Tell me honestly, does my butt look big in this?

So she looks taller at the front, but wider at the back. However, I doubt very much whether zebras waste much time worrying about body image, they have more pressing things, like not getting eaten by a lion, to worry about. 

So, anyway, I decided to cut my skirt on the crosswise grain and wear my stripes vertically - I'm trying for tall and thin! What about you - which way do you like to wear your stripes. Do you think it makes any difference? Do you care?

Tuesday, 9 August 2011

Burda Style skirt + top = tropical madness!

For approximately 360 days of the year my latest sewn outfit looks crazily optimistic when worn in my home city of London. But last week we just happened on a few 'heatwave' days that made me glad I hadn't totally lost faith in the sun ever shining on us again.

I'll have a Tequila Sunrise please!

Both the skirt and top are made from Burda Style magazine patterns that are easy to make. The skirt is pattern no. 114 from July 2008.

Burda Style #114, July 2008
I have made the pattern before (blogged about here) but this time I left out the eyelets and tie on the front yoke because I wanted a slightly more streamlined, less sporty look (and, yes, I was being lazy!). The fabric I used is 100% cotton.

The top is taken from an even older issue of Burda, it's pattern no. 119 from the July 2007 issue.  

Burda Style #119, July 2007
 
This is also an old favourite revisited because I first made a version of the top over two years ago. I kept meaning to make another one and I'm happy that I finally have. I like the style a lot - the gathers that go into the button band add some interest and nice shaping. The fabric I used is a silk that I have had in my stash for ages. 

Top out, more casual!

I hope that my choice of fabrics hasn't put you off these two really nice patterns. A dazzling sunshine yellow skirt paired with a bright and splashy flower print top is not everyone's cup of tea. I know that it's not really 'city chic' but sometimes I just can't help myself. I find I am irresistibly drawn to colours and prints that make me look like I have just stepped off a cruise ship. Is your wardrobe firmly rooted in your home climate or do you, like me, sometimes sew as if you are on a semi-permanent tropical vacation? Or, perhaps you actually do live in a hot-spot, in which case, do you sew as if you are hoping for snow?

Thursday, 21 April 2011

Vogue skirt and what's been keeping me busy!

In case you think I have been slacking on the sewing front since I returned from vacation I am here to report that, actually, I have been quite the busy bee with sewing related activities. I am very pleased with my latest skirt.

It’s made from Vogue 2647, one of those wardrobe patterns, designed by Adri. It is now out of print but if you happen to come across it, I do think that it is worth taking a second look just for the skirt. This is the second time I have made it (you can see my first version in this post). I like the simplicity of the sleek, no-waistband, A-line style (which I think flatters most people) but it has some nice details.

The button and loop back closure above the invisible zipper

The front slit

The fabric is 100% cotton, called Artiste Tweed, purchased from Vogue Fabrics and I have used some thick buttonhole thread for the topstitching to complement the black of the tweedy colouring. I lined it with black bemberg rayon (my favourite kind of lining).

More sewing news from me is that I have signed up for Jennifer Stern’s online course, on Pattern Review, called Blue Print to Blue Jeans. This is my first venture into getting a jeans pattern to fit – not easy! So far I have made a couple of muslins which I am tinkering about with but more about this when I actually have something made.


In the meantime, while the course is progressing, I have also been working on Simplicity 2339 – the Amazing Fit shirt. I had forgotten how MUCH WORK there is in making a shirt. Collar and stand, front placket, setting in sleeves, buttonholes - all so tricksy to get just perfect.

So, I have got a lot of difficult stuff going on - I hope it’s going to be worth it!

In the meantime, A Very Happy Easter to you all!

Tuesday, 8 March 2011

the first skirt of spring!

In my last post I promised (myself as well as you!) that my next garment would be something easy. This skirt, made from pattern 114 in the July 2008 issue of Burda Magazine, is certainly that but it does have some very nice details.

Here’s the line drawing so you can get a clearer idea of what’s going on with it
Burda’s description: “Your favourite skirt boasts loads of topstitching lines on the hem and a wide, shaped hip yoke with eyelets and tie bands for a sporty look.” Some of these details, especially the rows of topstitching, don’t show up very well in the photograph but in real life they do work nicely.

The fabric I used is an African print cotton. I would love to tell you that I purchased this in some exotic, far-flung location but, in fact I bought it from a market stall in Leeds (Yorkshire in the north of England). I absolutely LOVE African prints, the colours are always so alluring and the designs so wonderfully attractive. It appears I am not alone, African prints often make an appearance on the runway - L.A.M.B. featured some fabulous African prints in their Spring 2011 show

image courtesy of Style.com

But back to my skirt. The most nerve-racking part about making this skirt is adding the eyelets


There you are, with your skirt all beautifully constructed and you have to take a pair of scissors and cut two holes in the front yoke. Yikes! But, fear not, a couple of sturdy eyelets, a few confident bashes with a hammer and all is well again. If you have never done this before, I would, however, recommend at least one trial run with some scrap fabric just to be sure you know which way round to place the eyelets and how hard you need to wield the hammer.

I really enjoyed making this skirt – fun to make and easy to wear. I hope your Spring sewing has got off to a good start?

Saturday, 19 February 2011

Vogue 1203 - Tracy Reese skirt!

It seems that everything I sew at the moment is turning into a near disaster! However, I am really glad that I persevered with this Tracy Reese skirt – I absolutely love the finished product.

This is the pattern I used, Vogue 1203.


Before I show you the really nice thing about this skirt, let me mention my difficulties. This skirt has a raised waist so the waistband is shaped to conform to the body. It is cut so that the seam between the waistband and the skirt sits right on the waist and the waistband then becomes wider as it goes upwards towards the bust. Now, I have no doubt that the problem lies with my particular shape rather than the pattern, but once I had attached the waistband to the skirt and tried it on for fit, to my dismay, it was quite obvious that it just wasn’t going to work. Instead of following my shape, the waistband flared outwards like a kind of frill, there was no way that it was going to sit close to my body.

So, I ripped it off and threw it away. Instead I cut a new waistband but this time I made it a straight waistband, cut quite tightly to my waist measurement, which fits me much better but still keeps the raised waist style.

Anyway, the really nice design element of this pattern -


It has an exposed zipper at the back. This was my first time attaching an exposed zipper so I followed the pattern instructions exactly and, whilst I won’t try and tell you that I did it perfectly, it hasn’t turned out too badly.

I don’t know what to tell you about the fabric because I am not quite certain what it is. It is definitely wool of some kind but it has a strange shiny backing which makes it a bit tricky to iron but does give the fabric body and stops it from getting too creased. The print is rather crazy bold and being short I shouldn’t really wear such large prints but I don’t care because I like it. I used a bemberg rayon for the lining.

I think that Tracy Reese is a brilliant designer, I love her RTW collections, and although this skirt is a relatively simple style it is very well cut – the princess seams curve around the hips nicely and then flare out just the right amount. For me, wearing a high waisted skirt does take a bit of getting used to, I usually wear my skirts cut below the waist and then they can be a bit more forgiving ease-wise. With this style you need to wear it so that it is a little snug. So, deep breath, stomach in ….

I won’t be eating too many donuts while wearing this skirt. Probably not a bad thing!

Have a great weekend everyone.

Saturday, 1 January 2011

2010 - what worked and what didn't!

So, 2010 is over and it’s time to take a look at how my sewing year has gone. I completed the following:
13 Dresses
10 tops
6 skirts
1 jacket

That’s a total of 30 garments. When I looked back at what I had made during 2009 I was very interested to see that I had made a total of 29 garments. So this year I have succeeded in increasing my output by, er, just one garment!

However, I can say that I feel I have made quite a lot of progress in learning to sew to a much better standard and in making clothes that I really like wearing.

So, what worked for me in 2010? My award for my best garment of the year goes to this dress

Made from Butterick 5520 (blogged about here). As it’s a very ‘dressy’ dress I have, so far, only had the opportunity of wearing it three times but each time I have received compliments and I love having it hanging in my wardrobe, ready for a special occasion.

My vote for my favourite day dress has to go to this one

Made from Vogue 8555 (blogged about here). I wore this dress numerous times during the summer and it always made me smile.

My award for my most useful garment goes to this one

A simple black pencil skirt made from Vogue 8603 (blogged about here). Since making it I have worn it a lot – it just seems to go with everything and is good for day or evening. A classic wardrobe staple.

So what didn’t work this year? I will have to say my coat. What’s that, you are saying to yourself, she didn’t make a coat. Exactly. I said I was making a coat (blogged about here). I bought fabric for a coat. But no coat has materialized. Well, all I have to say for myself is there has been a lot of research and development but not too many results. I picked out a pattern from an old Burda Magazine, I spent ages making a muslin and reworking the muslin and altering the muslin but in the end, with a little anguish and a lot of frustration, I abandoned it. Maybe you, too, know that feeling? I am going to pick another pattern and try again. Perhaps my coat will be finished by the end of next year?

I hope 2010 has been a satisfying and productive sewing year for you? I would like to take this opportunity of saying how much I appreciate you stopping by to look at what I’ve made. I love to read your comments and am very thankful indeed for your friendship, advice and encouragement.

My warmest wishes to you all for a very happy New Year

Friday, 19 November 2010

Vogue classic pencil skirt finished!

Regular readers will know that my recent sewing activities have been aimed at building some winter wardrobe basics. So I had to make that classic essential - a black pencil skirt.

The pattern I picked out was Vogue 8603 (in case you are wondering, I am wearing it with the silk jersey top I made from Jalie 2806 blogged about in my last post). Here’s what the skirt pattern looks like

What this picture doesn’t show you, however, is the back view. The pattern gives the option of a gathered inset in the lower back. So, although my version looks pretty plain from the front, the back looks like this.

I do like a skirt that has a bit of back interest!

The lining is cut so that it is hand-stitched around the edge of the gathered insert, like this

The skirt is fairly simple to make and, as it has princess seams, it is not difficult to get a good fit. Next time I make this pattern I think I'm going to try the view with the gathers at the hips - I avoided this because I thought that extra fabric around this area might be unflattering but now I've made this skirt, I think that the side gathers would work.

One thing did puzzle me about this pattern, however, is the way Vogue tells you to do the waistband facing. Once you have constructed the skirt and the lining separately they tell you to pin the lining to the skirt wrong sides together and baste along the upper edges. Then they tell you to sew the facing right sides together with the skirt, then turn the facing to the inside and slipstitch to the zipper tape and tack at the seams. This means that the facing is only attached at the seams and is kind of loose inside. I’m not very experienced so perhaps their way is a good way? But I didn’t fancy it much.

Instead I decided to do away with the facings (as you can see in the photo above of inside the skirt). To be sure that the waist seam didn’t stretch out I sewed 1/4” seam tape to the inside of the skirt (along the seam line) before attaching the lining. I think that if you aren’t going to add facings this is an essential step to give the waist some stability. Then I just sewed the lining and skirt together along the top, right sides together, understitched the seam and flipped the lining to the inside.

I quite like having the skirt without facings – I think it gives a smooth line. I should mention that even if I had decided on keeping the facings, I still wouldn’t have done it the way that Vogue suggests. I would have sewn the facings to the lining to make one lining/facing unit and then sewn this to the skirt with the right sides together, along the waist seam. But that’s just me – you might like the way that Vogue advise doing it? Do you have particular feelings about facings?

Moving on, I’m feeling that I need a change from sewing separates so I’m planning on making a dress next - more on that soon …….

Thursday, 27 May 2010

June Burda Magazine, skirt #112 – finished!

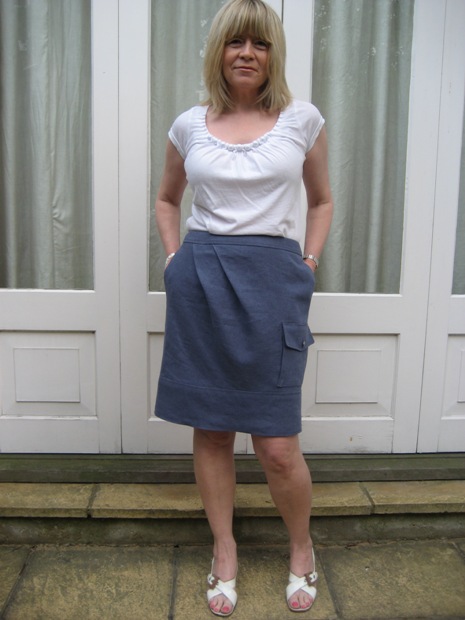
The latest edition of Burda Magazine arrived on Sunday morning and I decided that this month, instead of deliberating, I would just plunge right in on my favourite. Pattern 112 called to me, I happened to have a metre of linen in my stash, so here it is


I liked this pattern because, although it isn’t difficult, there’s quite a lot of interesting things going on with it. It has inseam pockets, pleats on one side of the front, a pleated patch pocket with a flap and a hem band. I really enjoyed making this one. Here’s the line drawing

I have to confess that Burda’s instructions for the inseam pockets had me slightly puzzled at first. When sewing this kind of pocket in the past I have sewn the pocket pieces onto the back and front skirt pieces then sewn the side seams and round the pocket all in one. Burda have you sew the side seams first (but not across the pocket openings) then you attach the pocket pieces to the seam allowances, then you sew the pocket pieces together. I like to try new things, so I did it their way and, what do you know, it worked out fine!

I did, however, depart from Burda’s instructions when it came to the hem band. The pattern tells you to cut the band with a 4cm hem which you are supposed to sew in place by hand. I decided it would be neater and give the bottom of the skirt more body if I cut the hem band so that it was double the finished depth plus seam allowances. I attached it right sides together to the skirt, folded it over to the inside and stitched it to the joining seam. Inside the skirt looks like this.

I should also mention that I added an inch or so to the length – I can’t quite carry off a very short skirt anymore!

My other pick from the June Burda magazine is this tunic pattern

I like the neckline and the neat little pleats at the front. But I won’t be making this one just yet because next on my list is a dress from Vogue 8555…………….. more on that soon!

Thursday, 15 April 2010

Burda magazine quick and easy A-line skirt

Way back at the beginning of March I mentioned that I was making this skirt, pattern 104 from the February issue of Burda Style magazine

So, you might be wondering, where is it? Well, with all the distractions of my Miami vacation, an eagerness to complete my skirt with the bow and my kitchen remodelling project, I now realise that I have been holding out on you! I did indeed complete not one but two! of these skirts in a mad frenzy of sewing in the days prior to my vacation. Here is the first one

It’s made in a classic white cotton stretch sateen and I have lined it with a light weight nude coloured bemberg rayon (which is an excellent stash stand-by). The pattern doesn’t call for a lining but with a white fabric to be worn in the sunlight it’s usually a good idea. Here’s a picture of the lining

Because I liked the first one so much I was inspired to throw together another one made from some printed cotton I had left over from a dress. This one I didn’t line, so it was even quicker to make.


There’s nothing particularly exciting about this skirt pattern but it does make a great summer basic – it has handy cut-in pockets, a curved waistband and an A-line shape that’s very comfortable to wear. If you’re looking for a casual skirt and want it fast, I would definitely recommend giving this one a try.

Moving swiftly on to what’s happening right now. Most of my kitchen units have now been installed so I have been able to move enough boxes out of the living room to make some sewing space. In between talking to the electrician, plasterer, tiler, window blind installer, carpenter and floor layer I have been making a muslin for this blouse, pattern 105 from this month’s issue of Burda magazine.
The fit is looking good so I am hoping to complete it soon. In the meantime, if you are thinking of making this one, I do have a tip – check that you actually need to insert the side zip. With my muslin I discovered that I don’t – I can easily get it on (and off!) without one.

More soon

Friday, 2 April 2010

Finished - Burda Magazine Bow Skirt!

My new skirt (pattern 125 from April’s Burda Magazine) has a bow, some pleats and a flounce – what more can a girl ask for!

and here's the front -

and the back -


I used a black 100% wool crepe, purchased last December in New York Elegant fabrics, which has just the right amount of drape for this style. I lined it with Bemberg rayon.

Once I had got over the shock of the tracing difficulties with this month’s issue of Burda (see my last post), I have to say that this skirt is very nicely drafted and went together without any trouble at all. The instructions were reasonably straightforward but I did make a couple of ‘improvements’.

Burda tell you to fuse shaped strips of interfacing to the upper edges of the skirt lining to stabilize the waist. This worked well but I also sewed ¼” seam tape to the wrong side of the outer fabric along the waist seam to be certain that it wouldn’t stretch out when worn.

To hem the flounce Burda instruct you to press the hem allowance of 1 ¼” to the inside and sew by hand but I decided to make a very narrow machine stitched hem instead. I would really recommend doing this because it makes the flounce hang much better.

When making the bow you might find (as I did) that you prefer not to press it flat. After sewing the lengthwise edges of the bow together you have to turn it right side out and press it so that the seam is centred on the back. When doing this I very carefully used the point of the iron to press the seam flat but made sure not to press the edges of the bow – this way the bow turns out a bit puffier not flat and sharp edged. Personally, I like a bow to be puffy!

When I saw this skirt in the magazine I knew I just had to have it and now I’ve got it, I’m delighted with it! I’d really like to make another one for summer - maybe a bright pink, or even a flowery print, would be nice?

More soon but, in the meantime ………….
A Very Happy Easter to You All

Tuesday, 30 March 2010

Whoa! What are the folks at Burda Magazine up to?

I was so eager to complete the lovely skirt that I had picked out of the latest Burda Magazine (see my last post) that I dropped everything and rushed to get out my tracing paper and pens. I eagerly found the right pattern sheet and, my goodness, my head started to swim! Now I’m all for saving paper but this is ridiculous. This month the folks at Burda seem to have decided that it’s ok to print twice as many patterns on each of the pattern pages. Well, can I just say, it’s not ok with me!

Here is a picture of the page from the April issue


And here is a picture of a pattern page from the March issue


Can you see the difference? All the previous issues of Burda that I have in my possession have pages A to H (8 pages) yet this latest issue has only got pages A to D i.e. all the patterns have been printed on to 4 pages. It’s a crazy maze and makes working out what lines you have to trace, and identifying the pattern markings, very difficult. Has anyone else noticed this or have I got one of a weird batch? I am hoping that this is only a temporary glitch and that next month normal service will be resumed, otherwise I’m going to have to get some new spectacles or maybe an industrial standard magnifying glass!

However, I persevered and did manage to trace the skirt pattern – thankfully it’s only four pieces – and I’m pleased to report that it’s coming together very well indeed. I shopped my stash for the fabric and picked out some lovely black wool crepe which has just the right amount of drape for the flounce at the hem. I am now working on the finishing touches but here is a sneak peak …..


….. of the bow before I stitch it to the back. I just love bows!

More soon ……….

Friday, 9 October 2009

IS THIS THE PLAINEST SKIRT YOU'VE EVER SEEN?

I know you're going to look at this picture of my new skirt and think "wow! ..... that's dull" but stick with me because there's some interesting stuff going on inside.

This skirt is made from Simplicity 2564

so I could have chosen to add pockets, trims, belt loops etc. but I decided I really needed a very plain skirt - I wanted it to look good with my new top (Simplicity 2501), featured in my last post, but I also wanted to be able to wear it with lots of other things. Sometimes you just have to bite the boring bullet and make a wardrobe workhorse.

It's made from a grey medium-weight denim, so it should be sturdy and can be dressed up or down to be casual or smart. Size 12 fitted straight out of the envelope but to be really perfectionist I made a small swayback adjustment. I made the following changes from the pattern instructions - I used an invisible zipper and I mitred the corner of the left back vent, which looks much neater that just folding it over. Also, I lined the skirt, putting a lace trim on the lining hem.

Above is a picture of the inside of the vent and you may be thinking "what's gone wrong there, why is there is a fold above where the vent is secured to the skirt?" But the reason for this is 'lengthwise ease'. When cutting the lining out I referred to my oracle - Connie Long's Easy Guide to Sewing Linings - and what Connie says is "Whenever you connect the lining to the outside vent, lengthwise ease is important to keep the lining from distorting the outer seam". So, as per her instructions, this is how I drafted the lining pattern -

The green line is the cutting line for the outer fabric and the red line is the cutting line for the lining. As you can see, the lining is cut a half inch lower from the pivot point to the hem line at the centre back, blending upwards to the original hemline at the side seam (note that for this pattern I have allowed 1 1/4" for the skirt hem and 5/8" for the lining hem and the lining is 3/4" shorter than the skirt). When sewing the lining to the skirt you match up the pivot points so that the lining hem is raised up and becomes level and a fold forms above the vent. So it looks a bit wonky inside but I think that it does actually work to make the outside look better and doesn't strain or pull the seam when moving, sitting etc.


Incidentally I initially found it a real headache to work out how the lining vent was attached and which side needed to be cut off and where until I looked at Jackets for Real People by Alto, Neall and Palmer. Even though their explanation was for a jacket vent it's the same for a skirt vent and I found their illustrations really easy to understand.


Next time I make this skirt I think I'll go crazy and add some pockets!


Related Posts Plugin for WordPress, Blogger...