Monday 30 May 2011

A day in Eugenia's sewing space ....

Ok , I’m ready to sew. This top shouldn’t take long to make.

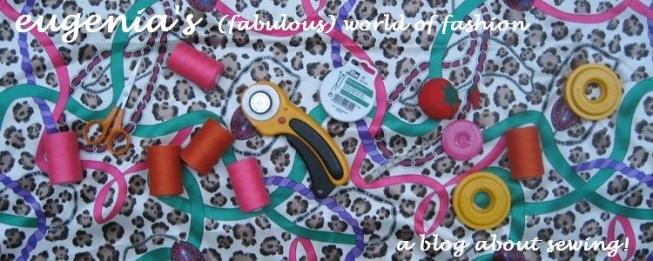
Quick look at the instructions and get the sewing machine threaded. Now where is that thread.....

Right, sewing machine threaded. Oh, I need to re-thread the serger too. I’ll just find that thread ...

That's done. I really am ready to sew now. Oooh, before I start, let's just check the blogosphere, see who's doing what …..

Ok, here we go. First stabilise the shoulder seams. Where did I put that vilene bias tape?

Shoulders stabilised. Maybe I'll just pop downstairs to have a cup of coffee and a couple of chocolate cookies to keep my strength up ….

Now where was I? Right, sew shoulder seams. Now for the neck binding. Oooh didn't I read a very good article about neck bindings in Threads Magazine? I'll just look for that magazine ….

Well that was interesting. But I think I'll just do it like the pattern says. Oh, I'm hungry. Must be lunchtime….

Right, let's have another look at the blogosphere, just to see what's new, and I need to check my e-mails. Oooh, look Gorgeous Fabrics is having a flash sale, just a quick browse …

Mmmm 8 yards of gorgeous fabric is going to be with me very soon. Better get this top done, make room for the new fabric. Right neck binding on. Oh, that's the phone. "Hi Mum. No, of course I can chat”


Where was I? Perhaps a cup of coffee and some more chocolate cookies will help me focus on this. Oh and isn’t there an episode of Murder She Wrote on tv around now?


Attach the sleeves to the body. Excellent. Oooh just remembered I meant to put a load of washing in the machine ....

Oh, there's my Burda magazine. I'll just take a look at that pattern I was thinking of making, maybe I'll have another chocolate cookie while I'm at it …

Right. Let's get serious about this sewing. Sew side seams, try it on, things are going really well. I'll just glance at the blogosphere and, while I’m at it, maybe I’ll have a look at the new Butterick patterns that have just come in ….

Sew hem. Phew, we're done. Wow, time to prepare dinner already? What! That simple t-shirt took me the whole day?

Does this sort of day sound familiar to you? Or are you awesomely organised, super-speedy and perfectly focussed when it comes to sewing? Can you finish a one hour top in 59 minutes flat? I'd love to know ...

Monday 23 May 2011

Burda 7645 - a t-shirt with bust darts .... interesting!

At this time of the year I always feel the need to fill my wardrobe with t-shirts. Cheap, light-weight cotton RTW ones are fine but it is nice to have something that looks not quite so casual and, more importantly, fits just right. So this is what I made


The pattern I used is Burda 7645. I wanted loose fitting but with some shape and, although I wasn't particularly in love with the picture on the envelope, this fitted the bill.


I made View A but shorter (the one on the left). What's interesting about this t-shirt pattern is that it has bust darts. It turns out that for my kind of shape (curvy), that works well. Another thing I like about this pattern is that Burda give sensible instructions for knit fabrics (something that the big four don't seem to do so well). It's very fast and easy to make. Sew bust darts, shoulder seams, apply neck and sleeve bindings, sew side seams, hem. You're done!

I thought this style worked well for this particular fabric - the simplicity of it shows off the print nicely. It's 100% rayon jersey and is designed by Anna Sui. It has a really cute print of birdcages and flowers in squares. I bought it from Vogue Fabrics, who describe it as "a playful mosaic to delight ornithologists and horticulturalists alike". Here's a closer look at it


I am definitely going to be making this pattern again.

Oh, but wait ....... I already have!

Version two is made from some fabric that I bought at Mood in New York - I think it's a rayon/lycra mix. I just love big splashy colourful flower prints. I have some more of this fabric so look out for a dress that I am planning for it!

Oooh and something exciting - President and Mrs Obama are due to arrive here in London tomorrow. I am eagerly looking forward to watching the news coverage so that I can check out all Michelle's outfits. I love that lady's style!

Monday 16 May 2011

Fabric Fandango and pattern stash sums

Some weeks ago I put myself on a severely restricted fabric diet. Absolutely no more fabric purchases until I have substantially reduced the extensive yardage in my stash. I was doing well, really I was …… until last Saturday afternoon. But it wasn't my fault, they made me do it. Yes, you know who you are!

On Saturday I was part of the large crowd of enthusiastic and very wonderful sewing people who descended upon London's Goldhawk Road for a gentle afternoon of restrained fabric buying. No, let me be honest, it was a wild, abandoned fabric-fest. At such a thrilling event to have purchased nothing would have been completely impossible. That is my story and I am sticking to it.

This Fabric Fandango was organised by the very lovely and talented Karen, from Did You Make That (do visit her blog for the full story, pictures and a list of the participants). Three cheers for Karen - we all had a fabulous and fun time. There were about forty of us - I was thrilled to meet so many other wonderful sewists!

So, a glimpse of my purchases.


All cottons, all bright and beautiful - I was clearly in tropical vacation mode. All I need to do now is to plan a vacation and to sew them into something nice! In the meantime, they do look lovely sitting amongst the very large pile of fabrics that I own.

Perhaps at this point I should also mention my pattern stash which has now also become seriously overstocked. I am considering doing the following calculation. Total number of patterns I own but have not yet sewn divided by the number of garments that I usually sew per year. The total would be the number of years it will take to actually use all of the patterns that I have purchased (assuming, of course, that during that time I don't buy any more patterns and I don't sew a pattern twice - pretty unlikely, eh?)

I daren't do that calculation because a quick look at my pattern collection tells me that I'm going to have to be sewing for an awful long time. Have you ever done this calculation when looking at your own pattern collection? Were you happy with the answer, or did it alarm you?

Before I go, a big hello to everyone who aided and abetted my fabric purchases on Saturday. I loved spending time with you and I'm looking forward to the next time! Thanks Karen, you're a star xxx.

Tuesday 10 May 2011

Finished jeans ... and some tips!

So, you have been warned, my jeans are finished and, yes, they are purple

But that is the wonderful thing about making your own jeans – you can make them any colour you like! The fabric is a cotton twill with a little lycra and it’s just perfect for a summer-weight pair of jeans – it is sturdy but cool.

These jeans are the product of taking Jennifer Stern’s ‘Blue Print to Blue Jeans’ course on Pattern Review. It was excellent – I got some great fitting advice by posting pictures of my muslin for Jennifer to comment on.

Here is the back view


And this is the pattern I used, it’s McCall’s 5894
I did, however, make the fit a little different because I lowered the front rise by about an inch and I narrowed the legs from the hips to the knees. I was aiming for a ‘relaxed’ fit with a slight flare. If you are thinking of using this pattern, the instructions are excellent but you might want to go down a size from the one they give for your measurements.

When it comes to making jeans I do think that it is worth the effort of adding the details that turn a pair of pants into a pair of jeans


The contrasting topstitching, the coin pocket, the rivets and the belt loops all give the garment ‘authenticity’ and a nice toughness, even if you aren’t working with denim.

When looking at the close-up photograph of the front, above, you might be wondering if I lost control of my sewing machine when it came to topstitching the coin pocket because on one side of the pocket the stitching extends to the waistband. This wasn’t a mistake, it’s one of the design suggestions that Jennifer gave us in the course and if you look at RTW jeans you will find that quite a lot of them have similar interesting stitching details.

While constructing my jeans there were two pieces of equipment that I found invaluable. This one,

called a Jean-a-ma-jig, is a simple but ingenious device that helps your machine get over the hump of lots of layers of fabric. In fact my jeans weren’t as bulky as denim but the difficulty wasn’t stitching through a lot of layers of fabric so much as when I had a difference in layers, i.e. when there is a hump of fabric and the presser foot can’t lie flat. Without the Jean-a-ma-jig I would never have got my belt loops sewn on without throwing my machine (and myself!) out of the window.

The second thing is a pair of Prym Vario Pliers.

These pliers, which cost about £9.50, make inserting rivets very easy indeed. One squeeze makes the hole, then you change the heads, place the rivets in the pliers, another squeeze and they are in. It’s very quick, simple and secure. I also used the pliers for attaching my jeans button (when you buy the buttons they come with the special heads for the pliers). No need for hammers, screws, wooden blocks etc. I purchased mine at Kleins in central London. If you want to see them in action, Kleins have a video on YouTube, you can see it here

Another tip. I discovered that it is much easier to make a neat buttonhole if you don’t sew down the front belt loop on the buttonhole side until after you have made the buttonhole. I made a couple of trial buttonholes on spare fabric without any difficulty but when I tried it on the real thing my machine jammed up. What was happening is that the back of the buttonhole foot (which extends quite a long way) didn’t like having to go over the belt loop. Once I had unpicked the stitching that held the belt loop down, so that I could fold it out of the way, the machine did the buttonhole without any trouble.

Before I go, I must, of course, also mention Peter’s MPB Jeans Sew-Along. If you want a clearly explained tutorial on jeans construction then Peter’s blog is the place to go.

Having finished making a pair of jeans I feel quite light-headed. Designer jeans cost a lot of money – it’s a billion dollar business - and there is something very liberating about the thought that I can make some of my own. In any colour, with any of the little design details that I fancy. And if I can, then believe me, so can you!

Wednesday 4 May 2011

Simplicity 2339 Amazing Fit shirt

I have, at last, finished my Simplicity, Amazing Fit Shirt. It wasn’t difficult but, phew, as I grumbled in my last post, there is a lot of work in making a shirt! Anyway, it’s done and here it is

The fabric is a rayon silk mix, purchased from Vogue Fabrics, called Artiste Orchid. I am wearing it with the skirt I made from Vogue 2647 (blogged about here) which is made from a co-ordinating fabric from Vogue Fabrics Early Spring 2011 collection.

Here’s how the shirt looks tucked in

This is my respectable ‘going to the office’ look – only I don’t actually have an office to go to any more but sometimes it’s nice to have this sort of outfit anyway.

Here’s how it looks worn more casually, which is more my everyday kind of look

This is the pattern I used

I made View B (bottom left) i.e. with the collar and with both horizontal and vertical darts but I used the sleeves from View A (bottom right) which have a button and tab cuff thing –

If you want to make this shirt slightly looser fitting, you can omit the vertical darts (as in View A) but I was keen to make an effort to get a pretty close fitting shirt. I can never find a RTW one that fits so I wanted to spend time getting a basic pattern with a good fit that I could adapt in different ways – when I can summon up the energy to tackle another shirt! This pattern has different pieces for A, B, C or D cups and gives a lot of advice on how to make fitting changes, so I would definitely recommend this as a starting point for shirt-making. Also I should mention that the instructions include a neat ‘rolling up’ technique for attaching the yoke and yoke facing to the main body of the shirt without having to do any hand-stitching, which looks much more professional.

Regular readers will know that, alongside this shirt, I have been making a pair of jeans as part of my Pattern Review ‘Blue Print to Blue Jeans’ course (although my jeans are purple, not blue!) They are almost finished and, so far, I’m feeling pretty pleased with them. But more about that soon ……

Related Posts Plugin for WordPress, Blogger...